
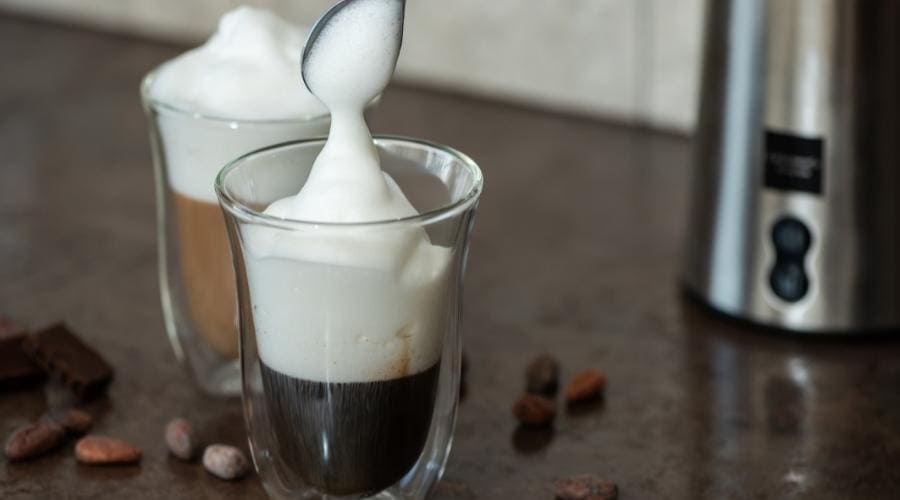
Adding foamy milk to a cup of coffee is an easy way to up the ante on your home coffee habit, Whether you’re making cappuccinos, lattes, or something else. Investing in a Breville electric frother is a handy way to make foamed milk.
Breville Frother Beeping issues & Fixes
Of course, like many other kitchen appliances, these Breville milk frothers eventually develop a plethora of internal and external issues. So I decided to write a complete Breville frother beeping noise troubleshooting guide to assist my fellow coffee enthusiasts who are coping with a broken milk frother.
A Broken Thermocouple
A thermocouple is a tiny electronic temperature sensor found within the milk frother. It is used to check up on the Milk temperature and turn it off when it’s exactly at the perfect value.
Sometimes, this device can be broken or burnt out with regular use. Before the process, a malfunctioning thermocouple will tell the controller that the desired temperature has been reached. The milk frother will turn on and then switch off!
Fix: In this case, the thermocouple must be changed. The good news is: It is easily removable from the PCB thanks to the sliding connection. Apply extra thermal lubricant to the fresh Thermocouple before fitting it to guarantee proper temperature transmission.
A shattered magnetic whisk
The magnetic whisk attachment may be damaged or destroyed due to natural wear and tear or after an unanticipated accident. The small neodymium magnet usually slips or falls and is lost, rendering the whisk useless.
Fix: It’s simple to replace the whisk on your Nespresso milk frother. You get one via your neighborhood Nespresso dealer. However, they can be a bit expensive, and obtaining them might take ages since most outlets don’t have them on sale.
The frother is too slow.
If this is the case, you will notice that your frother isn’t spinning as fast as it used to. To froth the milk, frothers spin at fast speeds and require a lot of electricity.
If the frother is moving slowly, you need to check the filling capacity and compare it to the instructions. You cannot add milk as desired. There’s a specified limit.
Fix 1: Each frother has a maximum capacity, and if you exceed it, the frother will become overwhelmed. A clogged frother will not create excellent froth and may even slow down the frothing process.
Fix 2: Check to see that the frother is correctly positioned. Check that all of the pieces are properly adjusted. If the alignment is incorrect, the frother will not operate properly.
Reread the User Instruction Manual to better grasp how to position the frother.
When the milk frother is filled with dirt.
If the milk frother is turned on, the next step is to check that the milk whisk is working properly. Milk residue will build up on the whisk over time.
This mostly pertains to individuals who do not discharge and rinse the whisk in between brews. The opening in the whisk and the area it slips in within the canister have a very narrow tolerance. If the whisk gets clogged with gunk, it will not spin smoothly.
Fix: The simplest method is to thoroughly clean the whisk using a strong cleaning solution. You will need the following items:
- 1⁄2 cup of white Vinegar
- 1 tablespoon of salt.
- A toothbrush, or a small scrubbing brush
In a glass jar, mix the salt and Vinegar, then place the whisk inside to rest for a few hours, or overnight.
Once the sponge is soaked, rinse it with clean water and scrape it with the toothbrush to eradicate any leftover grime.
Insert the whisk back into the milk frother, and you’re all set!
Let’s dig a little deeper:
How to clean your Breville milk frother The Right Way?
You’ll need
- Cleaning cloth
- Hot Water
- Non-abrasive detergents
- Warm water
Step 1: Detach the pitcher
Remove the pitcher from the power base before cleaning the frother. In most situations, neither the pitcher nor the base is dishwasher friendly.
Still, you may double-check your individual model for that important information. Do not submerge these frothers in water since they contain electronic parts.
Step 2: Allow cooling
Before dismantling the various pieces to clean individually, ensure that the frother and its parts are completely cool. Wash with warm running water once it has cooled.
Step 3: Begin cleaning.
- It is advisable to use a smooth, damp cloth with non-abrasive detergent to clean the milk that has developed in some locations. Gently scrub the afflicted area.
- Remove the whisk and the frothing disk. Soap and water should be used for cleaning.
- If your frother has a seal, remove it and clean the item with warm soapy water. You should also clean the pitcher with hot water and a clean cloth.
- If you spot any stains, use detergent to remove them and then thoroughly rinse.
- Wipe the lid, holder, whisks, and any other pieces with a mixture of warm water and a mild detergent. It is critical to remove any contaminants attached to these areas.
Final Step: Drying
Before fixing your frother back into its position, dry it thoroughly by wiping it with a cloth.
Cleaning with water helps remove most of the filth, but it is insufficient when trying to rid your milk frother of stubborn scales.
That’s where descaling comes in. Descaling is a cleaning method that will remove these hard, white impurities from your equipment.
Bonus Tip: How to Descale your Breville milk frother using Vinegar
- Use citric acid or a lemon-vinegar mixture to get rid of vicious limescale sediments on your milk frother.
- Combine the lemon juice and Vinegar in the pitcher.
- Let the solution sit for an hour or two before emptying the pitcher and rinsing it with clean water.
What to do when your Breville milk frother stops foaming?
As previously mentioned, failing to clean your Breville milk frother regularly and thoroughly can lead to dirt and mineral deposits developing within the unit over time.
But sometimes, the milk can be warm and too hot to foam, this leads to the milk frother not producing proper foam, resulting in beeping sounds when you switch on your milk frother.
So how do you solve this issue?
Try this,
- Make use of cool, fresh milk.
- Do not re-foam already heated milk.
- Reduce the amount of milk in the jug.
- Change your milk; certain kinds of milk and milk brands generate more froth than others. Practice with various milk alternatives to attain the desired outcome.
- Adding thick substances such as syrup, heavy powders, and huge flacks can help limit the amount of foam.
And finally:
The majority of electric and motorized frothers like the Breville have 3 objectives.
They can foam hot milk, cold milk, or heat it without foaming it.
When warming milk, the whisk at the bottom of the pitcher is detached. You probably wouldn’t be able to foam your milk if the whisk isn’t restored back into position.
Ensure the whisk head is in position. If your frother is completely new and not foaming, the whisk head has probably not been installed.
It’s occasionally stored on the lid, so try to look there first.
Why does the Breville milk frother make so much noise?
When preparing a latte,’ screaming’ or ‘hissing’ is a regular occurrence; it indicates milk expansion.
This expansion has the potential to scald your milk, so consider the scream as an audible alarm to modify your steaming procedure.
Begin spinning your milk jug as soon as you hear the hissing sound.
The steam wand should be around 2 cm in from the jug and no more than 1 cm below the milk surface.
Switch on the steam wand and tilt the jug with your hand till you feel the milk “hissing” or expanding.
When the milk starts to expand, it must go in a counterclockwise motion around the container, causing little bubbles to emerge.
The bubbles should be small. Once the milk has swelled sufficiently (remember 1 cm foam) and achieved a temperature of 80 oF, insert the steam wand into the center of the jug and keep whirling until the milk reaches between 150 to 160 oF.
Final Thoughts
Although the Breville Milk Frother is one of the most reliable ones on the market today.
Here are some features of the Breville milk frother:
- Ideal for both hot and cold beverages.
- Three-cup capacity
- Induction heating is used, and the temperature may be adjusted.
- Cappuccino disc included for rich and creamy foam.
- Included is a latte disc for smooth, velvety milk (Or even creamer!).
- Can immediately add hot chocolate powder to milk in jug Discs can be placed on the back of the foaming base.
- Dishwasher safe jug.
With regular use, however, it does periodically break down.
Nevertheless, if the root cause of the problem is identified, most issues are simple and straightforward to remedy.
When running a milk frother, you must pay attention to maintenance, cleaning, and troubleshooting. It’s all part of the deal, and this will allow you to enjoy as many cups of creamy coffee as you wish while also prolonging the life of your milk frother.