
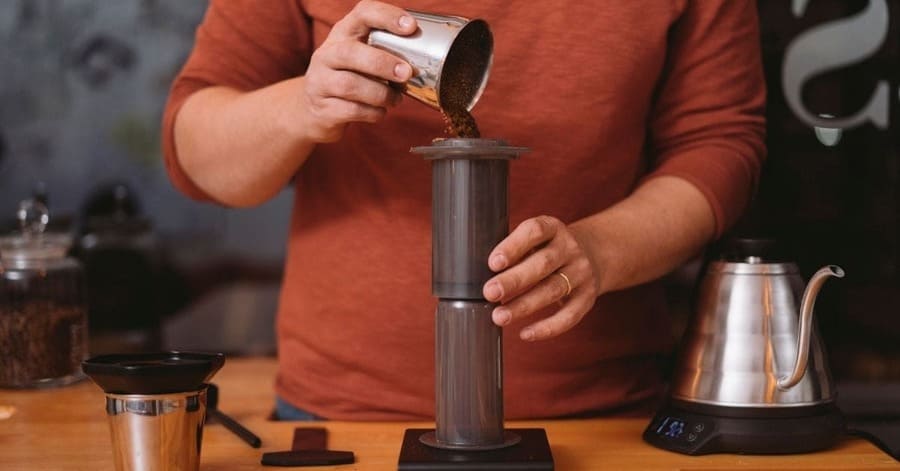
Quite literally a traveler’s savior, an AeroPress is a new kind of lightweight and compact coffee press that uses a rapid, total immersion brewing process to make smooth, delicious, full-flavored coffee.
While it may sound like the answer to all your coffee concerns, there is one tiny or rather quite large issue of the appliance using way more coffee than any other coffee maker, be it an espresso maker, a French Press, or Drip Filter.
The revolutionary appliance has often been called out for this particular problem, so I did quite a bit of research to try and dissect the real root cause.
Read on to get the full scoop on AeroPress: how it works, how much coffee does it Make, The pros and cons of having it? And a secret recipe to make the best use of it.
How Much Coffee Does Aeropress Make?
The traditional AeroPress Coffee Maker brews 10 ounces (or a large cup) of coffee at one time, while its travel equivalent, the AeroPress Go Travel Coffee Press makes an 8-ounce cup at one time and also comes with a 15-ounce mug attachment.
With both the traditional and the travel machine, there are ways around the one cup limit – I will address these later in my article.
Now, to have a better understanding of the Aeropress capacity, let’s look for comparisons versus other coffee makers. In fact, the AeroPress only falls short by 3-5 cups, of course with the exception of semi-industrial coffee machines that can make buckets full of coffee in one go.
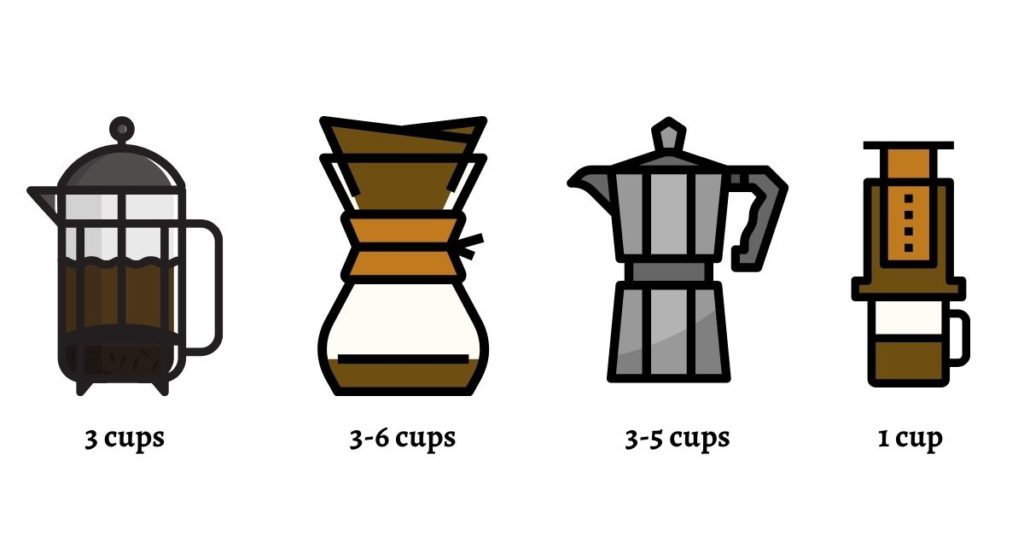
An average French Press makes 3 cups, a Moka pot yields between 3-5 cups while a Chemex has the ability to produce between 3-6 cups.
Nonetheless, if you’re looking for a coffee maker that can provide you quantity, an AeroPress is probably not for you because even with ways around the limited capacity, you can only ever get to maybe 2 cups at one time.
AeroPress Scoop Size
As mentioned above, the AeroPress Scoops which comes with the appliance has a capacity of 14 grams. This applies to both types of models, the traditional as well as the travel one.
According to the folks at AeroPress, you only need one scoop of fine coffee grounds to make a cuppa. However, ultimately, it does depend on your personal taste. You may slightly increase or decrease the ground amount depending on how strong you want your coffee to be.
Does AeroPress Use More Coffee?
The short answer is definitely yes, compared to most other coffee makers. However, that isn’t necessarily related to the Aeropress itself – there is much more to the story.
If you’re not up to speed with how the AeroPress works, here’s a quick explanation:
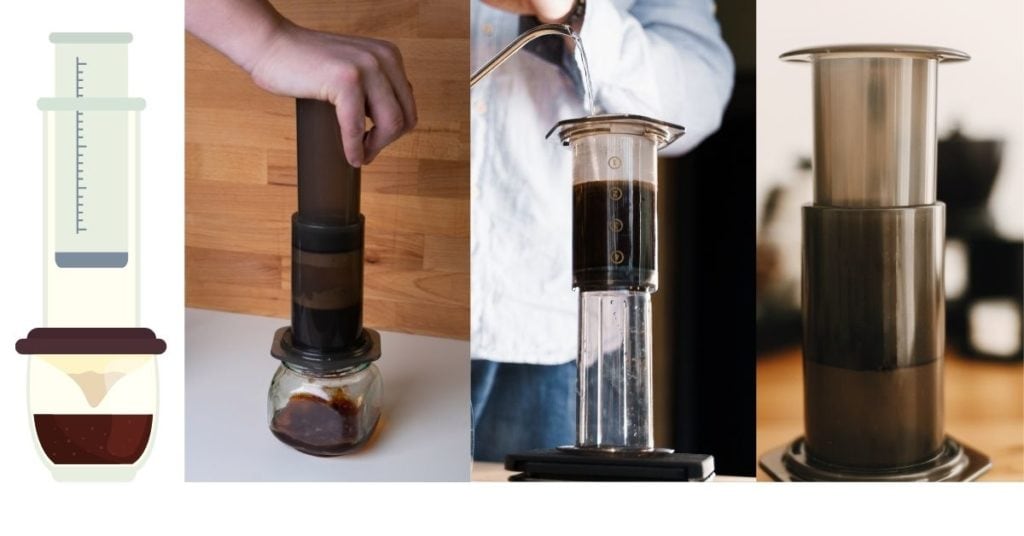
The appliance is basically a manual coffee maker that is made up of a cylindrical chamber, and a plunger with an airtight silicone seal, similar to a syringe. It functions similarly to a French Press where the coffee grounds are steeped into the water and then forced through a filter by pressing the plunger through the chamber.
The AeroPress is capable of brewing highly concentrated coffee, or “espresso-style” as the manufacturing company calls it, but can also be used to brew filter coffee-like beverages, as well as a cold brew.
Why Does AeroPress Use So Much Coffee?
The AeroPress, according to my calculations, essentially uses only slightly more coffee grounds as compared to an average coffee.
Let me explain.
An average cup of joe (this is a broad average of all types of coffees, across the board) which is about 8 ounces uses about 10.6 grams or 2 tablespoons of coffee grounds – this averages out to 1.25-1.5 grams of coffee per fluid ounce.
Now, in comparison, the AeroPress scoop is 14 grams in size and 1 full scoop is recommended for each 8-ounce cup, making this appliance’s average about 1.75 grams per fluid ounce.
Not that much of a difference, is it? The reason there is this slight difference in the first place is simply because of the size of the scoop.
I couldn’t figure out the reason behind this specific scoop size. Perhaps, the manufacturer’s research concluded that 1.75 is the optimum amount of coffee needed to make a fantastic cuppa, or maybe they didn’t want to take a risk of their appliance ever producing a weak cup of coffee.
Anyhow, there could be numerous reasons for this happening, but generally, none of them have to do with the functionality of the appliance or failures on its part.
And while the amount of coffee might not be the issue with an AeroPress, the only qualm you might have with it is its ability to only make one cup of coffee at a time. But then again, with extra incredible features like portability, durability, and speed, that is hardly a compromise.
How to Make the Strongest AeroPress Coffee
The AeroPress may only have the ability to make a single cup of coffee at a time, but it is always a damn good one. My guess is that it is in fact due to the increased amount of coffee that goes into making one cuppa with the appliance – as we all know, more coffee equals more flavor.
However, if you are still not satisfied with your AeroPress cup, here are some additional things to consider or change about your coffee routine that will make your single cup stronger, bolder, and definitely worth the extra effort and coffee:
AeroPress Water Ratio
Even though the AeroPress scoop has a fixed capacity of 14 grams, there is nothing really stopping you from heaping up the grounds a bit higher or even adding an extra half-scoop more.
Increasing the number of coffee grounds and thus affecting the water-to-grounds ratio can also help to give your drink a much stronger and bolder profile.
AeroPress Roast Type
For a regular cup of Aeropress coffee, you can go with a dark or espresso roast, whereas for the inverted method, which I’ll explain in detail, you may choose a Lighter roast.
That said, both dark and light type roast work really well with the Aeropress. As a matter of fact, the appliance is quite versatile. Think of it as an espresso-like device capable of producing a single cup serving of strong coffee.
AeroPress Grind Size
If you’re aiming for a strong cup, always ensure that you use finely ground coffee. The finer the grind is, the easier it will be for the water to extract flavors from it.
It also helps a great deal if the coffee beans are freshly ground because when fresh, the grounds disperse flavor more easily.
AeroPress Brew Time
The instructed brewing time in an AeroPress is about 10 seconds for a hot cup of coffee, and 1 minute for a cold brew. However, increasing the brewing time and letting the coffee grounds steep in the water for a few extra minutes can give your beverage a stronger flavor.
I would normally recommend leaving the coffee to steep for anywhere between 1 to 4 minutes depending on the intensity of flavor you are craving.
AeroPress Inverted Method vs. Regular Method
While reading up about letting coffee grounds steep in water in the AeroPress, I also came across the genius inverted method of brewing.
This method is essential for those that prefer a stronger flavor profile and therefore would like to steep their grounds for longer than usual. The inverting of the appliance gives you the freedom to steep the grounds for as long as you want.
The method was made popular in 2008, about three years after the appliance hit the market. Here is a step-by-step breakdown of the inverted method for you to try back at home:
? Place the plunger on your counter with the rubber seal facing upward.
? Position the chamber upside-down on the plunger, and push the chamber down so that the rubber seal enters the chamber by at least 20mm.
? Hold the chamber securely with one hand, and pour ground coffee and then hot water as desired into the chamber. You can then stir and steep the coffee grounds for any length of time.
? When the desired steep time is reached, screw the filter cap (with a filter in place) onto the chamber.
? Grip both the chamber and plunger with both hands and “invert” the AeroPress so that it is sitting directly on top of your cup or mug.
? Plunge the coffee through the filter into your mug as you would with the standard brewing process, and enjoy.
If you are new to AeroPress, I would suggest trying the traditional method first and then experimenting with the inverted one. This will allow you to taste both flavor profiles and pick the one that works best for you.
Is Inverted AeroPress Better?
It depends on your personal taste. If you prefer stronger coffee, the inverted method will be better for you. However, if you like your coffee the standard way, then there is absolutely no need to turn things upside down.
How to Make a Large Cup of Coffee with AeroPress
Much like the upside-down way around making a stronger cup of coffee with an AeroPress, there is also a way to make the most of the 8-ounce brew capacity. And by making the most of it, I mean making a bigger cup or even two cups of coffee at a time.
The AeroPress can only hold 250ml of water at a time therefore while increasing the coffee grounds is a piece of cake, finding the space for more water is a bit of a challenge, Many people choose to equip their Aeropress with add-ons to resolve the volume issue, but that’s a topic for another article..
In order to brew two average-sized cups of coffee, you would need the appliance to hold at least 430ml of water. Challenge accepted! There is a genius way to get to two cups with an AeroPress and it is called the Dilution Method.
The Dilution Method
This method requires you to brew an extremely concentrated coffee and then dilute it with extra water in the cups. The idea is to use double the amount of coffee ground and prepare the beverage in the inverted process to allow for a longer steeping time.
The result is an extremely potent “espresso-style” liquid that can then be poured into two different cups and diluted by adding some extra hot water.
The recommended amount of coffee for this method is 36-40 grams and the steeping time should be at least 2 minutes.
I would also advise against adding more extra water than was used for the brew because this may lead to over-dilution. The trick is to measure the brew and then use the same amount of water or less to top up the two cups.
Here is a step-by-step breakdown for those that can’t wait to try it out:
? Bring 500ml of water to a boil and finely grind 36g of coffee beans.
? Prepare the AeroPress for the inverted brewing method and pour the grounds into the brewing chamber.
? Slowly pour in the water into the AeroPress, leaving only a small space to allow for stirring.
? Let the grounds steep for about 30 seconds, and then stir gently for 15 seconds using the stirring paddle.
? Make sure all the grounds are well saturated, then fill the chamber to the very top with an extra bit of water. Let the coffee steep for at least 2 minutes.
? Continue the brewing process as per the inverted method until you have the resulting brew in a measuring cup.
? Pour equal parts of the concentrated brew into two cups and slowly add in the extra water to dilute them.
Stir gently, and enjoy!
The Bottom Line
Not only is the AeroPress extremely durable, intuitive, easy to use and maintain, and one of the most portable coffee-making appliances to exist, it also makes a killer cup of joe.
f you are a frequent traveler or just looking for a portable appliance to bring with you to the office that is great in quality, the AeroPress is definitely worth the investment (which isn’t a lot, to begin with).
Be sure to share your AeroPress stories with us and tell us how your experience has been!